From Blank Walls to Beautiful: DIY Home Decor Projects That Transform Any Space
Home should feel like a deep, contented exhale—a place that reflects who you are, not what a catalog suggests. The magic is that you don’t need a designer’s budget to create that feeling. With a little intention, some simple DIY projects, and a bit of courage to experiment, you can turn tired corners into beautiful, personal spaces that tell your story.
This guide will walk you through elegant, budget-friendly home decor projects, styling strategies, and before-and-after ideas you can truly recreate—whether you’re working with a studio apartment, a family home, or just one beloved room ready for a refresh.
---
Start With a Vision: Define Your Mood, Not Just Your Style
Before you pick up a paintbrush or a power drill, begin with a feeling. The most beautiful spaces are not just well-designed—they are emotionally coherent.
Ask yourself:
- How do I want this room to feel? Calm, energizing, cozy, sophisticated, playful?
- What 3–4 words describe my ideal atmosphere? (For example: airy, grounded, warm, minimal, romantic.)
- Which colors or textures make me feel that way—soft linens, warm woods, sleek metals, woven baskets, or glossy ceramics?
Create a simple “vision anchor” for the room:
1. **Choose a main mood word** – e.g., “serene.”
2. **Pick a base color family** – e.g., soft neutrals (warm white, greige, sand).
3. **Select 2 accent elements** – e.g., brass details and dusty blue textiles.
You don’t need an elaborate mood board. A single photo you love, a fabric swatch, or a piece of art can become your guiding reference. Each DIY choice—from paint color to pillow fabric—should echo that original feeling. This is what keeps the end result cohesive rather than chaotic.
---
High-Impact, Low-Cost Walls: Paint, Panels, and Personality
Walls are your largest canvas, and even a few simple projects can dramatically shift a room from “fine” to “finished.”
1. The Power of a Single Accent Wall
An accent wall is one of the easiest transformations:
- **Color approach:**
- For calm sophistication, try deep, muted tones like slate blue, olive, charcoal, or rich taupe.
- For warmth, choose clay, terracotta, or camel.
- For light, airy spaces, go one or two shades deeper than your existing wall color to add depth without heaviness.
- **Where to place it:**
- Behind the bed in a bedroom
- Behind the sofa or TV unit in the living room
- At the end of a hallway to draw the eye and make the space feel intentional
**Before and After Idea:**
- *Before:* A beige bedroom with a bed pushed against the wall, no headboard, minimal personality.
- *After:* The wall behind the bed painted a deep, moody green; a simple DIY wood headboard added (more on that next section); two framed prints above the bed; soft lamps on either side. The room now looks like a boutique hotel suite, even if everything came from budget stores and your own two hands.
2. Paint-Based Wall Tricks (No Construction Required)
- **Color blocking:** Paint the lower third of the wall in a richer shade and leave the upper two-thirds light. This visually grounds the room and mimics architectural paneling.
- **Painted “headboard”:** Tape off a wide rectangle behind the bed and paint it a contrasting color. Instant focal point, zero carpentry.
- **Frame gallery in a unified palette:** Gather thrifted frames, spray-paint them all matte black, white, or gold, and fill them with your photos, line drawings, or pages from old books. Arrange them in a grid or an organic gallery cluster.
A small investment in paint and painter’s tape can look like a professional refresh when you keep your color palette tight and your shapes clean.
---
DIY Furniture Glow-Ups: Refresh, Don’t Replace
You don’t need new furniture; you need a new story for the pieces you already own. A few key DIY projects can turn worn-out items into statement pieces.
1. Sand, Stain, and Style: The Elegant Dresser Makeover
**Steps:**
1. **Assess and clean** – Tighten loose handles, remove drawers, clean thoroughly.
2. **Sand** – Lightly sand to remove old finish or gloss. You can hand-sand smaller pieces.
3. **Refinish** –
- For a classic look, stain in a warm mid-tone wood and seal.
- For a modern look, paint in matte black, deep forest green, or greige.
4. **Upgrade hardware** – Swap dated knobs for sleek brass pulls, ceramic knobs, or leather handles.
**Before and After Vision:**
- *Before:* A dated orange-toned dresser with cheap metal knobs and a shiny finish.
- *After:* Soft, mid-tone wood with a matte sealant, brushed brass pulls, and a simple tray on top holding a candle, a stack of books, and a small vase. The dresser becomes both functional storage and a styled vignette.
2. The Upholstered Seat Rescue
You’d be amazed what fabric and a staple gun can do:
- Remove the seat from a dining chair.
- Stretch new fabric (linen, cotton, or a durable indoor/outdoor fabric) over the cushion.
- Staple tightly underneath, reattach the seat.
Choose fabric that echoes your room’s mood words—calm neutrals, playful patterns, or rich velvets. Suddenly, old chairs feel intentional, not inherited.
---
Textiles & Layers: The Easiest Way to Add Warmth and Luxury
If paint is your backdrop, textiles are your poetry. They’re also some of the most forgiving DIY projects.
1. Simple DIY Pillow Covers
Sewing straight lines is beginner-friendly, and even no-sew options with fabric glue or iron-on tape can look polished.
- **Fabric choices:**
- Linen or cotton for airy elegance
- Velvet or chenille for cozy, layered richness
- Woven or embroidered fabrics for texture
- **Shape and mix:**
- Mix sizes: 20x20, 18x18, lumbar pillows.
- Combine textures: two solids + one pattern per seating area often feels balanced.
2. Layered Rugs for Depth
If a large rug isn’t in the budget:
- Lay a neutral, inexpensive jute or sisal rug.
- Add a smaller patterned rug on top at an angle or centered under the coffee table.
This layered effect feels designer-level while being highly adaptable and budget-friendly.
---
Lighting Alchemy: Turn Harsh Rooms Into Gentle Sanctuaries
Lighting is often the difference between a space that feels flat and one that feels quietly luxurious.
1. Swap Bulbs, Not Fixtures
- Choose **warm white** bulbs (around 2700K–3000K) for living spaces and bedrooms.
- Avoid overly bright, cool white bulbs except in workspaces or kitchens where crisp light can be helpful.
A small change in color temperature can soften hard edges and make everything feel more inviting.
2. Create Layers of Light
Aim for three types of lighting in each room:
1. **Ambient:** Main overhead light or a soft-glow floor lamp.
2. **Task:** Reading lamps, desk lamps, or under-cabinet lighting.
3. **Accent:** Wall sconces, fairy lights in a glass jar, or a small picture light over art.
**DIY Upgrade:**
Replace a basic lampshade with a linen or pleated one, or even wrap a plain shade in a beautiful fabric (secured with fabric glue). The same lamp, with a more refined shade and warm-toned bulb, suddenly feels like a high-end piece.
---
Thoughtful Styling: Surfaces, Shelves, and Small Details
Styling is where your personality shows. Think of it as editing: less clutter, more meaning.
1. The “Three Heights” Rule for Surfaces
On coffee tables, dressers, or consoles, style using three different heights:
- **Low:** A tray, a stack of books, or a shallow bowl.
- **Medium:** A candle, a small sculpture, or a lidded box.
- **Tall:** A vase with greenery, a lamp, or a framed photo.
Keep items in a cohesive color story, and leave some negative space. A bit of emptiness allows the eye to rest and makes what’s there feel intentional.
2. Shelves That Tell a Story
Instead of cramming every shelf full, think in vignettes:
- Mix books with objects: lay some books horizontally, stand others vertically.
- Add one organic element per shelf: a plant, a stone, a piece of driftwood, or a small woven basket.
- Repeat materials: For example, touches of brass on two different shelves or the same tone of wood in multiple objects.
If you’re displaying collections (mugs, candles, ceramics), group them instead of spreading them around the room. Collections gain power when seen together.
---
Budget-Friendly Glow-Ups: Transformations You Can Actually Recreate
Here are three full-room transformation concepts you can adapt to your home, even on a lean budget.
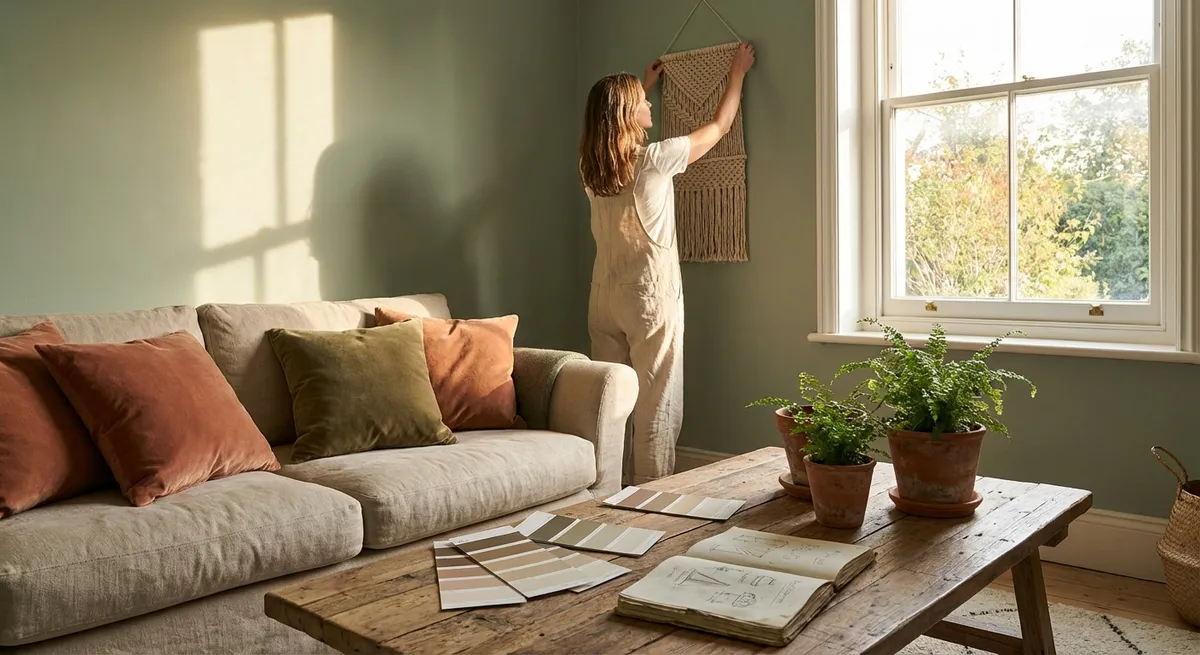
1. The Tired Living Room to Cozy Salon
**Before:**
A dark sofa pushed against the wall, a lone overhead light, mismatched decor, and no focal point.
**DIY After:**
- Paint one wall behind the sofa a soft, rich color (like mushroom, olive, or inky blue).
- Move the sofa slightly away from the wall and add a simple, affordable area rug to define the seating area.
- Add two DIY pillow covers and a throw that pick up the accent color.
- Style the coffee table with a tray, a candle, and a stack of books.
- Place a floor lamp in a corner and a small table lamp on a side table for layered light.
- Hang 2–3 frames above the sofa at eye level to anchor the space.
**Result:** The room feels intimate, collected, and considered—without a single piece of luxury furniture.
2. The Basic Bedroom to Boutique Retreat
**Before:**
White walls, a metal bed frame, a random nightstand, and no art or textiles.
**DIY After:**
- Paint a rectangle “headboard” behind the bed or do a full accent wall.
- Create a simple DIY wood headboard from plywood, sanded and stained or painted, mounted to the wall.
- Swap to matching pillow shams and a textured throw at the foot of the bed.
- Use two similar lamps (or matching shades on different bases) on each side of the bed.
- Hang a single large piece of art or a pair of frames over the headboard.
**Result:** The room now feels intentional and restful, like a calm hotel room with your own personality woven in.
3. The Cluttered Entryway to Serene Welcome Nook
**Before:**
Shoes scattered, coats piled on a chair, no clear drop zone.
**DIY After:**
- Add a narrow bench or a simple DIY wood bench.
- Mount a row of attractive hooks or a peg rail at a uniform height.
- Place a basket beneath the bench for shoes.
- Hang a mirror above the bench to visually expand the space and offer a last-minute check before heading out.
- Add a small rug to soften the transition from outside to in.
**Result:** Guests (and you) walk into a calm, organized entry that sets the tone for the rest of the home.
---
Sustainability and Intention: Decorating With a Conscience
Beautiful design doesn’t have to come at the cost of the planet—or your future self.
- **Shop your home first:** Move items between rooms before buying new pieces. That throw in the living room might be perfect on your bed.
- **Thrift with a plan:** Look for solid wood pieces with good lines, not perfection. Scratches can often be sanded; dated hardware can be replaced.
- **Choose quality where it matters most:** A good mattress, supportive seating, or a sturdy table will serve you for years and make everything else feel more elevated.
- **Embrace patina:** Wear on wood, faded fabrics, and small imperfections add soul. A home that looks slightly lived-in often feels warmer and more inviting.
When your DIY choices align with your values—reusing, restoring, and caring for what you own—you’re not just decorating; you’re building a relationship with your space.
---
Conclusion
Home doesn’t become beautiful all at once; it evolves each time you touch it with intention. A painted wall, a refreshed dresser, a carefully styled shelf—these small, steady gestures of care accumulate into rooms that feel deeply “you.”
You don’t need perfection or professional skills. You only need curiosity, a clear mood in mind, and the willingness to take the first small step—a test patch of paint, a single DIY pillow cover, one corner restyled with love.
Start with one project. Let that success inspire the next. Over time, those blank walls and tired pieces will quietly transform into a space that welcomes you home like a dear friend: warm, elegant, and entirely your own.
---
Sources
- [U.S. Department of Energy – Lighting Choices to Save You Money](https://www.energy.gov/energysaver/lighting-choices-save-you-money) – Explains bulb types, color temperature, and efficiency, helpful for planning layered lighting at home.
- [HGTV – Budget-Friendly Living Room Update Ideas](https://www.hgtv.com/design/decorating/design-101/budget-friendly-living-room-updates-pictures) – Real-world inspiration for affordable living room transformations and decor tweaks.
- [Architectural Digest – How to Choose the Right Paint Color](https://www.architecturaldigest.com/story/how-to-choose-paint-color) – Professional advice on selecting paint colors and understanding undertones for walls and accents.
- [Martha Stewart – Furniture Makeovers You Can Do in a Weekend](https://www.marthastewart.com/1542932/furniture-makeovers) – Practical tutorials for refinishing, painting, and updating furniture with DIY techniques.
- [The Spruce – How to Decorate a Room from Start to Finish](https://www.thespruce.com/decorate-a-room-from-start-to-finish-2213405) – Step-by-step guidance on planning, layering, and styling a space for cohesive interior design.