Everyday Rooms, Extraordinary Style: DIY Decor Transformations on Any Budget
Home should feel like an exhale—the place where your shoulders soften and your mind unclenches. You don’t need a designer budget or a degree in interior design to create rooms that feel intentional, beautiful, and deeply “you.” With a few thoughtful DIY projects, a bit of planning, and a willingness to experiment, you can transform even the most ordinary spaces into quietly stunning sanctuaries.
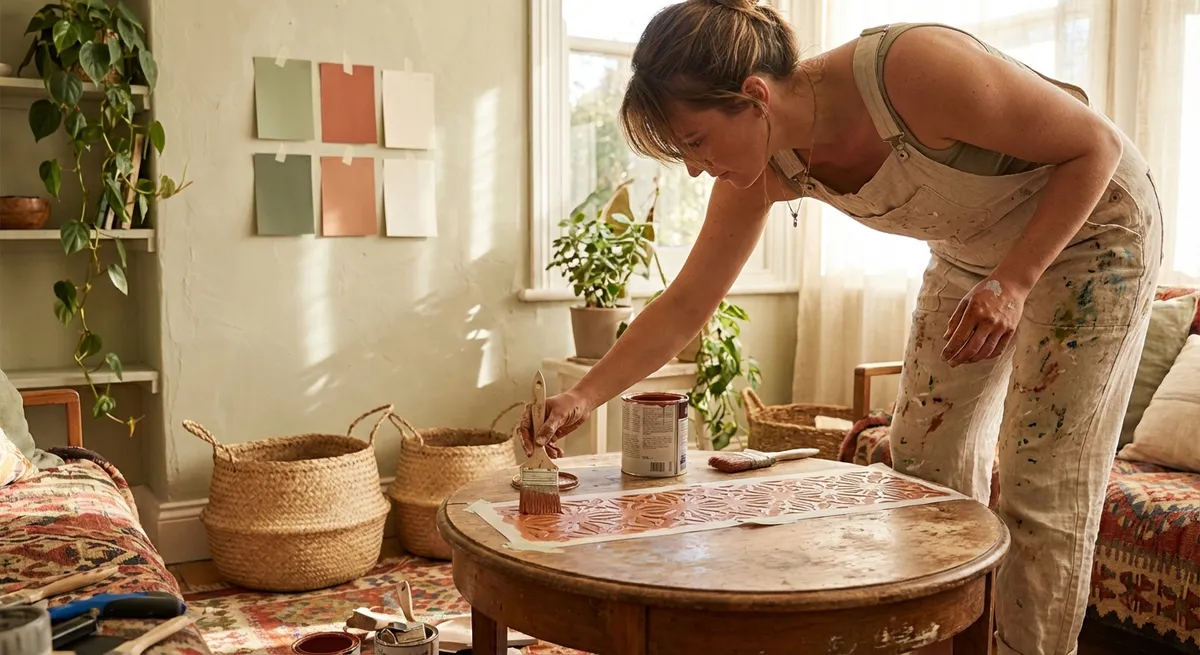
This guide walks you through practical, elegant DIY decor ideas—from walls and furniture to textiles and lighting—plus before-and-after transformation concepts you can adapt to any home.
---
Start with a Vision, Not a Shopping Cart
Before you pick up a paintbrush or open a decor app, pause to set your direction. A clear vision protects your budget and your energy.
Begin by walking through your home slowly. Notice:
- Which spaces feel cluttered or visually noisy
- Which corners feel cold, unfinished, or forgotten
- What you love already: a chair, a view, a color, a texture
Choose one room or one wall to start. Take a photo in natural light; this will be your “before.” Then, define your vision with three anchors:
1. **Mood word**: Calm, joyful, grounded, airy, cozy, sophisticated.
2. **Color story**: 2–3 main hues plus 1–2 accent colors (neutrals count).
3. **Function**: What do you *want* to do here—read, cook, work, host, rest?
With those decisions, you’ll filter every project idea: *Does this support the mood, colors, and function?* If not, it’s a distraction, not a design choice.
---
Elevate Your Walls: Simple Projects with Big Impact
Walls are the largest canvas in your home—changing them often gives the most dramatic before-and-after.
1. Painted Accent Wall (or Half Wall)
A single accent wall can define a room without overwhelming it.
**How to do it well:**
- Choose the wall your eye naturally lands on (often opposite the door).
- Pick a deeper shade of a color already in your space—pillows, rug, artwork.
- For a modern, elegant twist, paint only the bottom **two-thirds** of the wall and leave the top third white or a soft neutral. This “color blocking” adds architecture where none exists.
- Use painter’s tape and a level for crisp lines; sample at least two colors on the wall and view them at different times of day before committing.
**Before & After idea:**
- *Before*: All-white living room, sofa floating with no definition.
- *After*: Deep moss-green half wall behind the sofa, framed art above the color line, and a floor lamp in warm brass. The room suddenly feels grounded and intentional.
2. DIY Gallery Wall with Personal Meaning
Instead of buying generic art in bulk, curate a story.
**Sources for artwork and frames:**
- Mix thrifted frames with newer ones for depth and character.
- Print black-and-white family photos, travel snapshots, or even scanned handwritten recipes.
- Add non-photo items: pressed leaves, fabric swatches, architectural drawings, concert tickets.
Lay everything out on the floor first. Start with one anchor piece slightly off-center, then build around it, keeping 2–3 inches between each frame. For elegance, keep one element consistent: all black frames, all white mats, or a cohesive color palette.
**Placement tip:** Hang the center of the grouping at eye level—around **57–60 inches** from the floor.
---
Furniture Refresh: Luxury Looks from Budget-Friendly Updates
You don’t always need new furniture; you often need *new eyes* and a bit of creativity.
1. Paint, Stain, and Hardware Makeovers
A tired dresser or nightstand can become the statement piece of a room.
**Step-by-step essentials:**
1. Clean the piece thoroughly; remove hardware.
2. Lightly sand to help paint or stain adhere.
3. Apply a primer if you’re painting, especially over dark or glossy finishes.
4. Choose a satin or semi-matte finish for an elevated look.
5. Replace old knobs with brass, matte black, or ceramic pulls for instant polish.
**Before & After idea:**
- *Before*: Orange-toned pine dresser with dated hardware.
- *After*: Soft taupe paint, matte black bar pulls, and a linen runner on top holding a lamp, a small tray, and a plant. The piece now looks like it came from a boutique showroom.
2. Rethink Function: One Piece, New Purpose
Sometimes the transformation is not physical—it’s about placement and use.
- Turn an old desk into a chic vanity with a mirror, jewelry tray, and a stool.
- Use a narrow console as a coffee station or bar setup.
- Stack simple wooden crates, stained or painted, into a vertical bookshelf.
This kind of reimagining is especially powerful in small spaces where each piece must work harder.
---
Textiles: The Quiet Power of Fabric and Layers
Textiles are the secret to making a space feel finished, soft, and inviting. They’re also one of the easiest DIY-friendly updates.
1. DIY Pillow Refresh
Instead of buying entirely new pillows, upgrade covers.
**Ideas:**
- Sew simple envelope-style pillow covers from linen, cotton, or even repurposed curtains or tablecloths.
- Mix three scales of pattern: one large (floral or abstract), one medium (stripes or checks), one small (dots or subtle weaves) in coordinating colors.
- Use inserts that are slightly larger than the covers for a luxe, full shape.
**Color tip:** Anchor with neutrals (cream, sand, charcoal) and add 1–2 accent tones (sage, rust, deep blue) that echo elsewhere in the room.
2. Curtains that Add Height and Drama
Hang curtains **higher and wider** than the window to give the illusion of taller ceilings and larger windows.
- Mount rods as close to the ceiling as possible, or 4–6 inches above the top of the window frame.
- Extend rods 6–10 inches beyond the window on each side so curtains frame the view rather than block it.
- For a gentle, elegant “break,” let curtains kiss or slightly puddle on the floor.
If sewing feels daunting, use iron-on hem tape to adjust lengths or transform flat sheets into custom curtains.
---
Lighting: Layered Glow for Instant Atmosphere
Light shapes how every color and texture appears. A well-lit room feels warm and intentional, even if the furniture is simple.
1. Layer Your Light Sources
Aim for **three types of lighting** in each room:
- **Ambient**: overall light (ceiling fixture, pendant, or floor lamp)
- **Task**: focused light for reading, cooking, working (desk lamp, under-cabinet lights)
- **Accent**: mood-setting highlights (picture lights, string lights, candles, small table lamps)
Replace harsh, cool bulbs with warm white (around **2700–3000K**) for a softer, more flattering glow. Wherever possible, use dimmable options to shift from “work mode” to “evening unwind.”
2. DIY Lighting Upgrades
- Wrap a plain lampshade with linen or textured fabric for an elevated look.
- Use removable wallpaper or paint on the inside of a lampshade for a subtle surprise of color.
- Add battery-operated puck lights inside bookshelves, glass-front cabinets, or under wall shelves for soft, gallery-style illumination.
**Before & After idea:**
- *Before*: Overhead light only, shadows in the corners, room feels flat and stark.
- *After*: A floor lamp beside the sofa, a table lamp on a sideboard, and warm candles on the coffee table. The same room now feels like an evening retreat.
---
Styling Surfaces: Vignettes that Tell Your Story
The art of styling is about restraint, rhythm, and meaning—not cluttering every surface.
1. Use the “High–Medium–Low” Rule
On a console, coffee table, or dresser, create small groupings that vary in height:
- **High**: a lamp, a tall vase, or stacked books with an object on top
- **Medium**: a framed photo, smaller vase, or decorative box
- **Low**: a small bowl, candle, or beaded garland
Limit yourself to an odd number of objects in each vignette (3 or 5 tends to look balanced). Leave intentional negative space—empty area allows the eye to rest and makes each object feel more special.
2. Nature as the Final Layer
Fresh or dried greenery instantly softens a room.
- Clip branches from your yard or a nearby park (where allowed) and place them in a tall glass or ceramic vase.
- Use eucalyptus, olive branches, or simple leafy stems for a timeless look.
- Incorporate natural materials like woven baskets, jute trays, or wooden bowls for warmth and texture.
Even in a minimalist home, one thoughtfully placed plant or branch can transform a cold corner into a living moment.
---
Budget-Friendly Strategies that Still Feel Luxurious
Elegance lives in choices, not price tags. These habits keep your projects affordable and refined.
1. Shop Your Home First
Before buying anything:
- Move a mirror from one room to another to bounce more light.
- Swap rugs between spaces to see if they shine more brightly elsewhere.
- Combine books, candles, and trays from different rooms into a single, curated arrangement.
Often, what you already own just needs a new setting.
2. Embrace Slow Decorating
Resist the urge to “finish” a room in one weekend. Instead:
- Start with foundational pieces: paint, major furniture, and rugs.
- Live in the space for a few weeks to understand how you actually use it.
- Add art, lighting, and accents gradually, editing as you go.
Slow decorating leads to spaces that feel collected rather than assembled, timeless rather than trendy.
3. Mix High and Low Thoughtfully
Choose where to invest and where to save:
- **Invest in**: Good mattresses, sofas with solid frames, quality rugs in high-traffic areas.
- **Save on**: Side tables, decorative objects, pillow covers, art prints, and seasonal pieces.
This mix allows your home to feel elevated overall while respecting your budget.
---
Real-Life Transformation Scenarios You Can Adapt
To spark your imagination, here are three “before-and-after” concepts you can recreate in your own home with simple DIY steps.
1. The Blank Rental Living Room
**Before:**
White walls, basic overhead light, a sofa pushed against the wall, no art, echoing acoustics.
**After (DIY approach):**
- Add a large, neutral area rug to anchor the seating.
- Create a removable “accent wall” with peel-and-stick wallpaper or a painted canvas the size of a headboard behind the sofa.
- Add two curtain panels hung high and wide to frame the window.
- Introduce a simple gallery wall of personal photos and art prints in cohesive frames.
- Layer a floor lamp and table lamp for evening warmth.
Minimal changes, but the room becomes inviting, layered, and uniquely yours—without violating rental rules.
2. The Overcrowded Bedroom
**Before:**
Too much furniture, mismatched bedding, piles of clothing and decor on every surface, feeling restless instead of restful.
**After (DIY approach):**
- Remove one large piece (an extra chair, dresser, or bench) to create breathing room.
- Repaint walls in a soft neutral or muted tone (pale sage, clay, or warm gray).
- Choose a single bedding palette and stick to it—crisp white sheets, a textured throw, and two to four pillows in complementary tones.
- Style only the nightstands: a lamp, one book, and one personal object each.
- Add a small rug under the bed to ground the space.
The room shifts from chaotic to hotel-like calm, achieved more by editing than buying.
3. The Forgotten Hallway or Entry
**Before:**
A narrow, dim corridor with blank walls and no real purpose.
**After (DIY approach):**
- Add wall hooks or a simple rail with pegs at the entry for bags and coats.
- Place a slim console or wall-mounted shelf with a mirror above to bounce light.
- Style a tray for keys, a small plant, and a candle to welcome you home.
- Add a runner rug to visually lengthen and soften the space.
- Consider a single statement color or artwork at the end of the hall to draw the eye forward.
This once-forgotten transition area becomes a graceful entrance that sets the tone for the rest of your home.
---
Conclusion
Decorating your home with your own hands is not about perfection—it’s about participation. With every brushstroke, every rearranged chair, every thoughtfully styled corner, you’re quietly telling yourself: *I deserve to live in a space that nourishes me.*
Start small. Paint a single wall. Swap a lamp. Sew one pillow cover. Let each project build your confidence and refine your taste. Over time, your home will become a living story of your creativity and care—an everyday crown of beauty and comfort you’ve made for yourself.
---
Sources
- [U.S. Department of Energy – Lighting Choices to Save You Money](https://www.energy.gov/energysaver/lighting-choices-save-you-money) – Explains types of light bulbs, color temperature, and energy-efficient options that are useful when planning layered lighting at home.
- [IKEA – Curtain Hanging Guide](https://www.ikea.com/us/en/rooms/living-room/how-to-hang-curtains-pub7ee54b64) – Practical visual guide to hanging curtains higher and wider to make windows look larger and ceilings taller.
- [Benjamin Moore – How Light Affects Color](https://www.benjaminmoore.com/en-us/paint-and-stain-inspiration/interior/how-light-affects-color) – Discusses how natural and artificial light change the appearance of paint colors, helpful when choosing wall colors or accent walls.
- [The Spruce – How to Arrange a Gallery Wall](https://www.thespruce.com/how-to-create-a-gallery-wall-4154712) – Step-by-step tips and layout ideas for designing a cohesive gallery wall using art, photos, and objects.
- [Better Homes & Gardens – DIY Furniture Makeovers](https://www.bhg.com/decorating/makeovers/furniture/diy-furniture-makeovers/) – Real examples and techniques for transforming dated furniture with paint, stain, and new hardware.