Crafted Corners: DIY Details That Refine Every Room
A home rarely transforms in one grand gesture. More often, it shifts in quiet, beautiful increments—an evening with a paintbrush, an hour rearranging a bookshelf, a weekend breathing new life into a forgotten chair. DIY decor is not just about saving money; it’s about imprinting your spaces with your own story. On HazelCrown, we celebrate the elegance of these small, thoughtful projects and how they can gently—but powerfully—reshape the way your home feels.
This guide will walk you through approachable DIY ideas, styling principles, and before-and-after transformations that work in real homes, on real budgets, and with real lives in mind.
---
Seeing Your Home as a Canvas, Not a Constraint
Before you pick up a hammer or a paint roller, pause and look. The most successful DIY projects begin with observation.
Stand in the center of a room and ask:
- Where does my eye naturally go first—and do I like what it lands on?
- Which areas feel bare, and which feel crowded?
- Are there unused corners that could become “moments” rather than dead space?
This perspective shift turns “problem areas” into creative invitations. A blank corner becomes a reading nook. An awkward wall becomes a gallery. A tired dresser becomes a focal point. The goal is not perfection; it’s intention. When you see your home as a series of vignettes waiting to be crafted, DIY becomes less intimidating and far more inspiring.
---
Layering Texture and Warmth with Simple, Hands-On Projects
Elegance in decor often comes down to texture—what you can feel as much as what you see. Thoughtful DIY projects can bring that sense of depth without overwhelming your space or your budget.
Consider these approachable, texture-forward ideas:
- **Hand-stitched cushion covers:** Start with plain linen or cotton covers and add simple stitched details along the edges—contrast thread, a row of tiny X-stitches, or delicate running stitches. Even beginners can create artisanal-looking pieces in an evening.
- **Softly frayed fabric runners:** Take a length of natural fabric (linen, cotton, or even a repurposed curtain), cut it to fit your table or console, and gently fray the edges for a relaxed, lived-in elegance.
- **Wrapped vases and planters:** Use jute twine, cotton rope, or strips of leftover fabric to wrap basic glass vases, old jars, or inexpensive planters. Secure with hot glue and keep the palette neutral for a quiet, cohesive look.
- **Layered throw combinations:** Style is a DIY in itself. Pair a lighter, crisp throw (like cotton or linen) with something cozier and chunkier (like a knit or faux shearling) over the arm of a sofa or at the foot of a bed, letting both drape in an effortless, slightly undone way.
The key is restraint: choose a small palette of materials—perhaps wood, linen, and ceramic—and repeat them across the room through tiny, handmade details. This repetition creates harmony, even when each item is unique.
---
Transforming Everyday Furniture with Intentional Upgrades
You don’t need a workshop or power tools to give furniture a new identity. With some planning and patience, subtle DIY upgrades can redefine an entire room.
Here are thoughtful approaches that feel elevated, not crafty:
- **Hardware as jewelry:** Swapping out generic knobs for brass, matte black, or ceramic pulls is one of the simplest transformations. On a dresser or sideboard, choose hardware that repeats a metal finish already present in the room (a lamp base, a frame, or a mirror) to tie everything together.
- **Soft paint finishes:** Instead of high-gloss bright colors, consider muted, velvety tones: warm greige, deep olive, inky blue, or chalky cream. Using a satin or matte finish paint can make even a budget piece feel sophisticated. Lightly sanding edges after painting can add subtle character.
- **Two-tone tables:** For tired coffee tables or side tables, keep the top in a natural wood tone (or faux wood contact paper on a smooth surface) and paint the legs in a soft neutral. That contrast adds visual interest without feeling busy.
- **Textile-wrapped headboards:** If a new bed isn’t in the budget, create or refresh a headboard using plywood (or an existing frame), foam padding, and a beautiful fabric. Staple the fabric tightly at the back, keeping lines clean. A headboard in a quiet, textured textile—like linen or bouclé—instantly makes the room feel thoughtfully designed.
When planning furniture DIYs, create a small mood board first. Gather paint swatches, fabric scraps, and photos of inspiration pieces; this limits impulse decisions and helps ensure each project works with your broader home story.
---
Thoughtful Wall Projects That Don’t Require Full Renovations
Walls often hold the greatest potential for transformation—with or without major construction. Elegant, doable wall projects can be completed in a weekend and change how your space feels instantly.
Here are accessible, design-forward options:
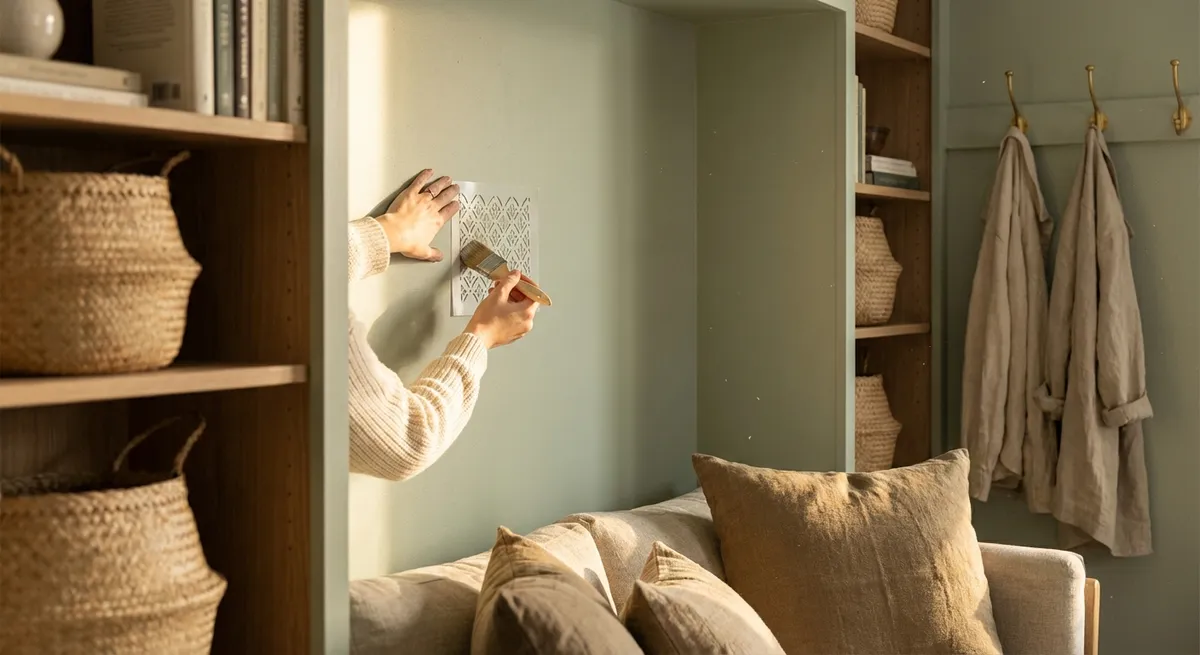
- **Painted frames and “zones”:** Instead of painting an entire wall, try painting a large rectangle or arch behind a bed, desk, or console table. This acts like a built-in headboard or backdrop, grounding the furniture and creating an intentional “zone” in an open plan room.
- **Curated mini gallery walls:** Collect 5–7 pieces that share a color palette or mood rather than a theme—photography, line drawings, vintage book pages, or pressed flowers. Use simple frames (all black, all wood, or all white) and hang them with consistent spacing. Lay out the arrangement on the floor first to find a balanced composition.
- **Subtle, removable texture:** If you rent or prefer commitment-light changes, consider removable textured wallpapers or wall decals with tone-on-tone patterns (like soft stripes or small geometrics). Use them on a single accent wall, in a hallway, or behind shelving to add depth without overwhelming the space.
- **Slim picture ledges:** Mount narrow ledges and layer frames, small art pieces, and even slender vases. This allows you to refresh your display seasonally without creating new holes in the wall.
These projects respect your time and your walls, while still letting you express a refined visual point of view.
---
Styling With Intention: Vignettes, Balance, and the Art of Editing
Once your DIY projects are complete, styling becomes the bridge between “nice objects” and a truly cohesive room. The way you place, group, and edit your pieces determines how polished your space feels.
Some guiding principles:
- **Work in odd numbers:** Group decor items in threes or fives—a candle, a small vase, and a framed photo on a tray, for instance—to create visual interest that feels natural.
- **Vary heights and shapes:** When styling a console or coffee table, combine tall (a lamp or branch-filled vase), medium (stacked books), and low (a small bowl or sculpture) items. This creates a gentle rhythm for the eye.
- **Use trays as anchors:** A simple tray or shallow basket can contain smaller items, instantly making them feel purposeful rather than random. Place a tray on your coffee table, vanity, or nightstand and build your vignette within that boundary.
- **Leave intentional negative space:** The truly elegant room knows when to stop. Give surfaces breathing room—every corner doesn’t need to be filled. A single branch in a ceramic vase on a side table can be more impactful than a cluttered collection.
- **Repeat colors and materials:** Echo a color at least three times in a room (a throw, a pillow detail, and artwork, for example) to create visual cohesion. Do the same with metals, woods, or fabrics.
Treat styling like writing a sentence: every object is a word. Some are necessary, some are beautiful, and some are simply extra. The art lies in knowing which ones to keep.
---
Before & After: Small Shifts, Meaningful Impact
Imagining the “after” can be difficult when you’re standing in the “before.” Here are three realistic transformations that rely on effort and intention more than money:
**1. The Dim, Unfocused Living Room**
- *Before:* Dark, mismatched lamps; scattered decor; a coffee table catching everyday clutter; walls with one small piece of art floating too high.
- *After:*
- One corner lamp replaced with a tall floor lamp in a warm tone.
- Coffee table cleared and styled with a tray, a stack of books, a candle, and a small greenery stem.
- A simple gallery wall created behind the sofa with uniform frames at eye level.
- Two new DIY pillow covers in a coordinated palette made from affordable fabric remnants.
The room feels designed, not because everything is new, but because everything has purpose.
**2. The Forgotten Entry Nook**
- *Before:* A bare sliver of wall near the door; mail piling up on the nearest surface; shoes floating everywhere.
- *After:*
- A slim, wall-mounted shelf installed at waist height, painted to match the wall.
- A round mirror hung above to bounce light and invite a quick check before leaving.
- Hooks mounted for bags and coats, with a small woven basket below for shoes.
- A small DIY art piece or framed quote styled on the shelf with a tiny plant.
Now, the first impression of your home is intentional and calm.
**3. The “Nothing Special” Bedroom Corner**
- *Before:* An empty corner holding an unused chair covered in clothing, poor lighting, and no defined purpose.
- *After:*
- Chair cleared and softened with a DIY throw pillow.
- A floor or wall-mounted lamp added for warm, focused light.
- A small side table or stacked crates beside the chair with a candle and book.
- A simple painted rectangle on the wall behind to visually frame the nook.
That corner becomes a reading retreat—a place you’re drawn to rather than a spot to drop laundry.
These examples remind us that transformation is often a collection of small, manageable projects with a shared intention: to honor how you live and what you love.
---
Creating a DIY Plan You’ll Actually Finish
Inspiration is intoxicating; unfinished projects are discouraging. A simple, clear plan helps you enjoy the process instead of feeling overwhelmed.
Consider this gentle framework:
1. **Choose one room, one goal.** For example: “Make the living room feel warmer and more cohesive.”
2. **Pick 2–3 projects only.** Perhaps: a cushion refresh, a styled coffee table, and a mini gallery wall.
3. **Set realistic timelines.** Assign each project a weekend or a pair of evenings. Write those dates down.
4. **Gather materials in advance.** Create a checklist for each project—tools, paint, fabric, hardware—and shop once, thoughtfully.
5. **Document your progress.** Take before photos, in-progress shots, and final reveals. Not just for sharing, but to remind yourself how capable you are.
DIY should feel like a collaboration with your home, not a race. Allow yourself to work slowly and with care; the calm you bring to the process will echo in the spaces you create.
---
Conclusion
Your home does not need to be perfect to be beautiful, and you do not need to be a professional to make it feel intentional, layered, and deeply yours. A painted wall shape here, a refreshed piece of furniture there, a lovingly styled corner—these are the quiet acts that turn four walls into a haven.
When you craft your own decor, you are not just saving money or filling space. You are learning your taste, honoring your routines, and writing your story into every corner. Let each project be a small, elegant step toward a home that reflects who you are—and who you are becoming.
---
Sources
- [The Spruce – Interior Design Basics: 7 Elements of Design](https://www.thespruce.com/interior-design-basics-4129142) – Overview of foundational design principles like balance, emphasis, and proportion
- [HGTV – Budget-Friendly Room Makeover Ideas](https://www.hgtv.com/design/decorating/design-101/budget-friendly-room-updates-pictures) – Practical inspiration for low-cost transformations and styling
- [Better Homes & Gardens – DIY Furniture Makeovers](https://www.bhg.com/decorating/makeovers/furniture/) – Step-by-step guides for updating furniture with paint, hardware, and fabrics
- [Architectural Digest – How to Hang Art Correctly](https://www.architecturaldigest.com/story/how-to-hang-art-correctly) – Professional tips for placing and grouping wall art elegantly
- [Martha Stewart – How to Create a Gallery Wall](https://www.marthastewart.com/1543120/how-create-gallery-wall) – Detailed advice on planning, arranging, and styling gallery walls